
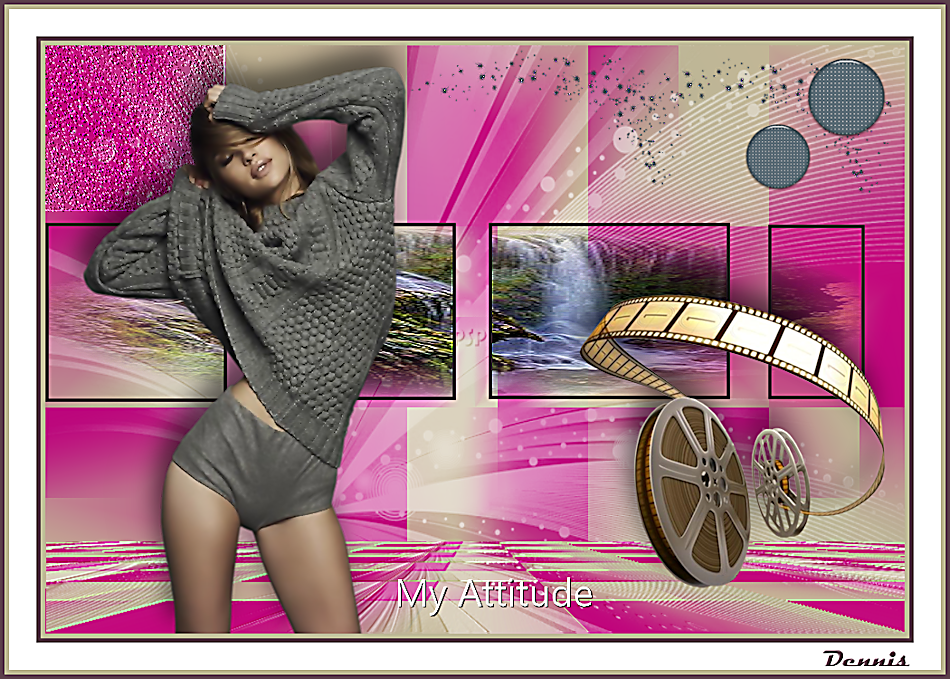
My Attitude-English
|
This tutorial is Translated into English by Dennis
Thank You for Your Beutiful Version of my tutorial My Attitude. And Thanks for Translating. |
|
|
Materialer:
|
| ||
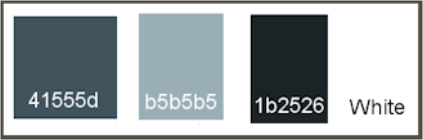
I used the following colors.
Color 1 #b5b5b5
Color 2 #41535d
Color 3 #1b2326
Color 4 #ffffff
************
Tubes used in this tutorial
Liza tube 342
Background-18
Blue-buttom-aurora23design
Dark-stardust
tubeclaudiaviza-mix44
*************
Plugins
Mehdi / Wavy Lab 1.1
Mehdi / Sorting Tiles
MuRa’s Meister / Perspective Tiling
Alien Skin Eye Candy 5 Impact
***********
Mask / LF-Mask17-25102013
Font Nirmala-UI is included in materials
***************
In the Materials Palette
Foreground Color 1 #b5b5b5
Background Color 2 #41535d
Let us begin.
1.
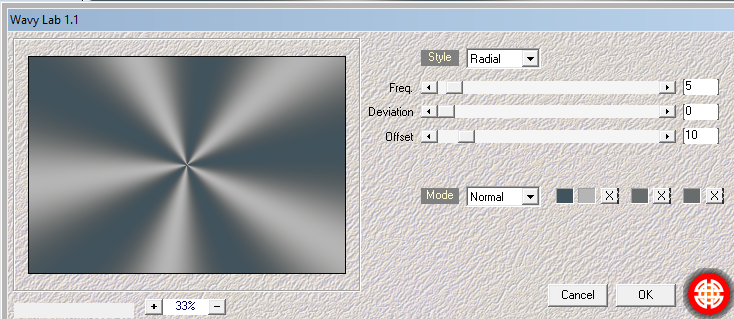
Open a New Image 950 x 650 pixels
Effects / Plugins / Mehdi / Wavy Lab 1.1
(with the following settings)
1.
Open a New Image 950 x 650 pixels
Effects / Plugins / Mehdi / Wavy Lab 1.1
(with the following settings)
2.
Effects / Plugins Mehdi / Sorting Tiles
with the following settings.
Effects / Plugins Mehdi / Sorting Tiles
with the following settings.

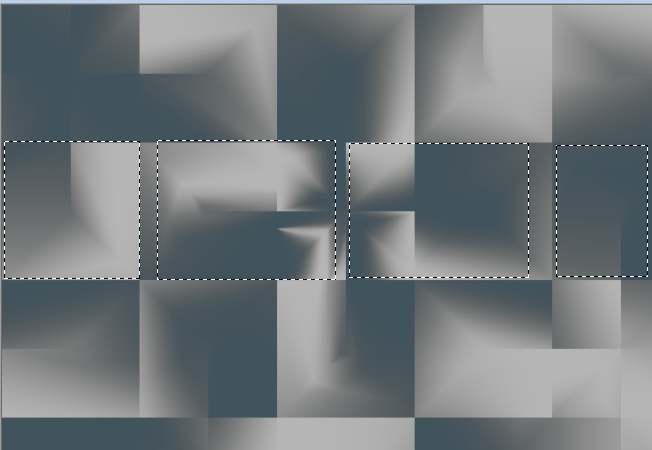
3
Make 4 Selections on the Image
(see print below)
Make 4 Selections on the Image
(see print below)
Layers New Raster Layer
Selections / Selection Modify / Selection Select Borders
(with the following settings
Selections / Selection Modify / Selection Select Borders
(with the following settings
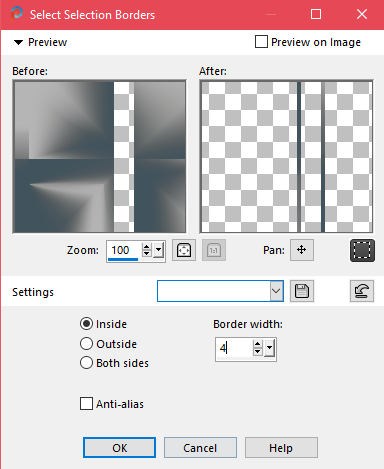
Flood Fill the Border with #1b2326
Selections / Select None
4.
Activate the Magic Wand / Select inside the 4 Frames
Layers / New Raster Layer
5.
Open the Tube back ground 18
Edit / Copy
Edit / Paste into Selection
Layers / Properties / Blend Mode / Multiple
Selections / Select None
Effects / Edge Effects / Enhance
6.
Activate Raster Layer 1
Layers / New Raster Layer
Flood Fill the Layer with #ffffff
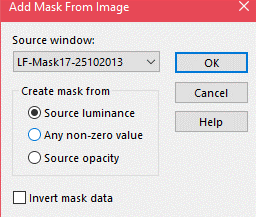
Layers / New Mask Layer from Image
(see print below)
Selections / Select None
4.
Activate the Magic Wand / Select inside the 4 Frames
Layers / New Raster Layer
5.
Open the Tube back ground 18
Edit / Copy
Edit / Paste into Selection
Layers / Properties / Blend Mode / Multiple
Selections / Select None
Effects / Edge Effects / Enhance
6.
Activate Raster Layer 1
Layers / New Raster Layer
Flood Fill the Layer with #ffffff
Layers / New Mask Layer from Image
(see print below)
Layers / Merge / Merge Group
Layers / Properties / Opacity 55%
Layers / Merge / Merge Down
(so the mask Layer and Raster Layer 1 are 1 Layer)
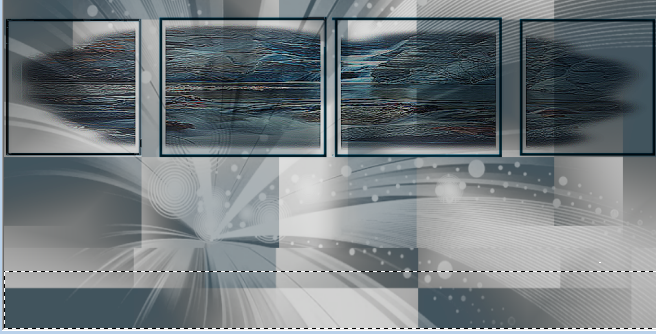
7.
View / Rulers
Activate the Selection Tool / Rectangle
Make a Rectangular Selection on the bottom of the Merged Layer
Near the bottom of the Image approximately 100 pixels high
(see print below)
Selections / Promote / Selection to Layer
8.
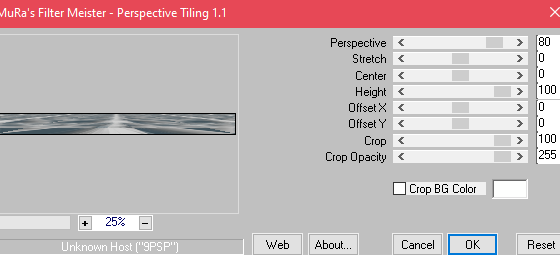
Effects / Plugins / MuRa’s Meister / Perspective Tiling
with the following settings.
8.
Effects / Plugins / MuRa’s Meister / Perspective Tiling
with the following settings.
9.
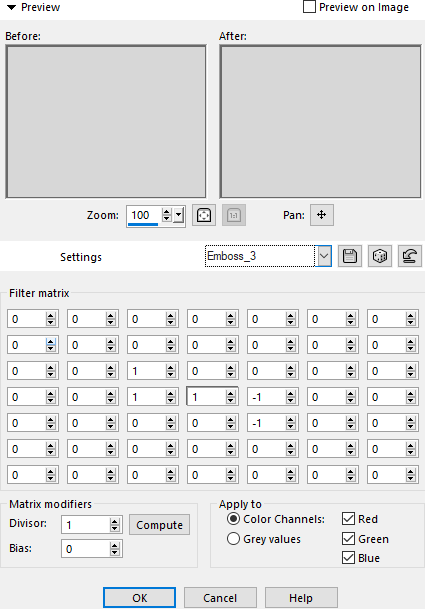
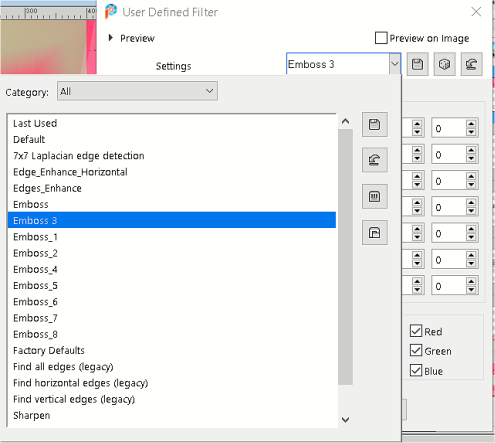
Effects / Users Defined Filter Emboss 3
(User Defined Filters are found at the top the Plugins,in Effects.
Click on User Defined Filter,
then the Drop Down Menu.
If you do not have that filter go to your favorite Plugin download site to find it,
then add it to your PSP Presets Folder.)
Selections / Select None.
10.
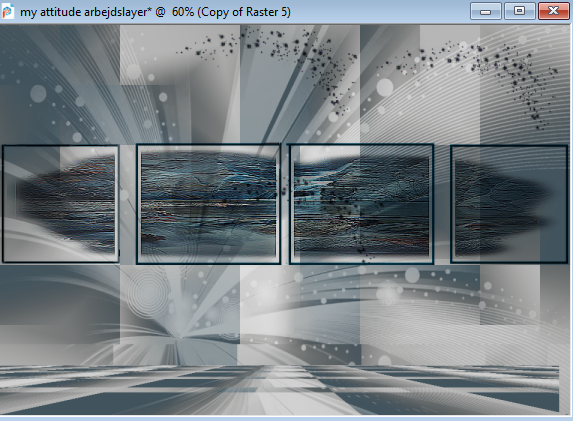
Activate the Top Layer
Open / Dark Stardust
Edit / Copy
Edit / Paste as a New Layer
Activate the Pick Tool
Move up to the Right Top Corner
Layers / Duplicate
Move to the Left
Layers / Merge / Merge Down
Adjust / Sharpness / Sharpen
(see print below)
10.
Activate the Top Layer
Open / Dark Stardust
Edit / Copy
Edit / Paste as a New Layer
Activate the Pick Tool
Move up to the Right Top Corner
Layers / Duplicate
Move to the Left
Layers / Merge / Merge Down
Adjust / Sharpness / Sharpen
(see print below)
11.
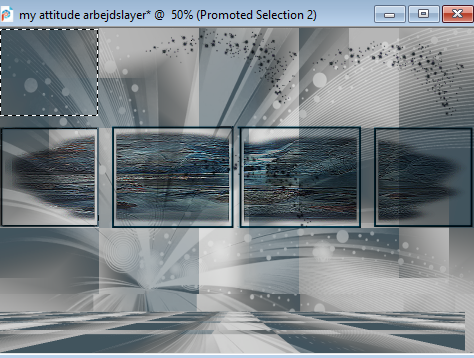
Activate / Raster Layer 1
Make a Selection in the upper Left Corner
(see print below)
Activate / Raster Layer 1
Make a Selection in the upper Left Corner
(see print below)
Selections / Promote Selection to Layer
Layers / Arrange Bring to Top.
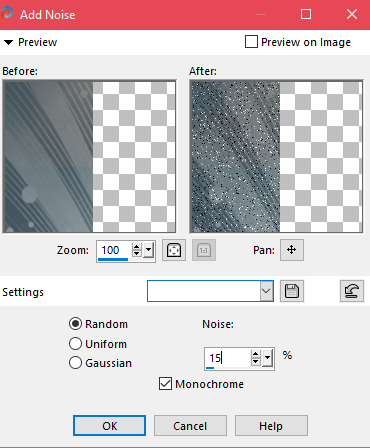
Adjust / Add Remove Noise / Add Noise
(see print below)
Layers / Arrange Bring to Top.
Adjust / Add Remove Noise / Add Noise
(see print below)
Selections / Select None
Effects / Users Defined / Emboss 3.
Effects / Users Defined / Emboss 3.
Selections / Select None
Effects / Users Defined / Emboss 3
Effects / Users Defined / Emboss 3
12.
Open the Tube Claudia Viza-mix-44
Edit / Copy
Edit / Paste as a New Layer
Resize 75%
Move it over to the right and down
(see example).
Open the Tube Claudia Viza-mix-44
Edit / Copy
Edit / Paste as a New Layer
Resize 75%
Move it over to the right and down
(see example).
13.
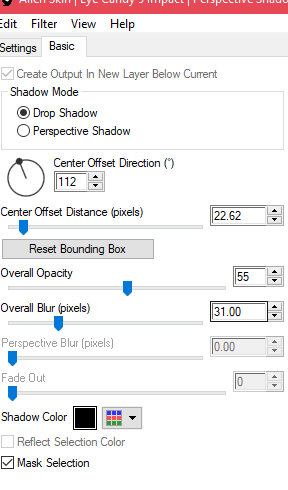
Effects / Plugins / Alien Skin Eye Candy 5 Impact /
Perspective Shadow / Basic Tab
(with the following settings)
Effects / Plugins / Alien Skin Eye Candy 5 Impact /
Perspective Shadow / Basic Tab
(with the following settings)
14.
Open Liza tube 342
Edit / Copy
Edit / Paste as New Layer
Move her over to the left
Image / Resize 85%
Effects / Plugins / Perspective Shadow
(the same as Step 13)
15.
Open decor blue Buttom
Edit / Copy
Edit / Paste as New Layer
Image / Resize 85%,
Repeat Resize 1x
Layers / Duplicate
Place as in the Example
16.
Open the Text Tool
Choose the Font “Nirmala UI

Type / My Attitude in #ffffff
In the Layers Palette / Convert to a Raster Layer
Effects / 3d Effects / Drop shadow / 2 / 2 / 100 / 4 Black
17.
Image / Add Borders 5-pixels Foreground Color #b5b5b5
Image / Add Borders 5-pixels Background Color #41535d
Image / Add Borders 30-pixels #ffffff
Image / Add Borders 5-pixels Foreground Color #b5b5b5
Image / Add Borders 5-pixels Background Color #41535d
**********
Add your name or watermark
You are now done with the Tutorial
Hope you enjoyed this little Tutorial
14-2-2021
Aurora
©
